
4 Q&As with Chris Minick

Chris A. Minick was featured in the article “Commited Contributors” from issue #323.
Minick has been one of Fine Woodworking’s most valued wood-finishing experts over the last 50 years. But perhaps even more valuable than Minick’s full-length articles were the thoughtful, personalized answers he gave to hundreds of readers who asked very specific questions. Here are some of them.
What are the deleterious effects finishes have on archivally kept photographs and rare books?
What kinds of deleterious effects can woods, wood materials, and finishes have on archivally kept photographs and rare books? Do public archives, such as the libraries at the Smithsonian Institution, use special woods or finishes in and on their display and storage cases?
Chris Minick replies: Manufactured wood products, wood finishes, and even solid wood all “off-gas” materials that are potentially dangerous to photographs and rare books. Formaldehyde vapors emitted from manufactured wood products, such as particleboard, MDF, and hardwood plywood, are particularly detrimental to color photographs. Consequently, these common construction materials should be avoided when building display or storage cases for photographs and books. The Upper Midwest Conservation Center of the Minneapolis Institute of Art recommends that metal cabinets with a baked enamel finish be used for storing rare photos and books. When you display books and photos, you should isolate them from any finished wood by mounting them with archivally acceptable photo or book mounts. Museum-quality mounting materials are usually available from large art-supply stores or by mail order from University Products Inc. I don’t know of any special or secret finishing materials used on museum display cases. Standard air-drying polyurethane varnishes are routinely used by many large museums for finishing display cases. The finishes are allowed to thoroughly cure before the case is used. Cure times for finishing materials are surprisingly long, often involving several months.

I have tried to re-glue my belt sander belts with many different adhesives, including epoxy, but to no avail. Is there any method for repairing these belts?
In my shop on the island of Roatan in the Caribbean, I do quite a bit of case work that requires belt-sanding of very hard woods such as rosewood and lignum vitae. I find that using any sanding belt coarser than 100-grit creates a heat buildup that often causes the belt to separate on the glue line. I have tried to re-glue my belts with many different adhesives, including epoxy, but to no avail. Is there any method for repairing these belts?
Chris Minick replies: Standard abrasive belts are often bonded or spliced wide a phenolic adhesive system. Unfortunately, phenolic adhesives are brittle and not particularly heat tolerant; under heavy sanding loads, me glue bonds fatigue and me splice separates. Check me glueline on your broken belts. Dark red or black gluelines indicate a phenolic adhesive. Drew Langsner replies: In 1975-1977, I made and sold hundreds of the same type of hayfork that you ask about. At one higher-quality belts are spliced with a more flexible heat-resistant urethane adhesive. Urethane splices are characterized by clear or white colored glueline. These belts cost a little more but are designed to withstand the rigors of heavy production sanding. Procedures for making sanding belts in d1e shop were presented in Fine Woodworking #94 by Bill Skinner (p. 44) and Robert Vaughan (p. 45). Either method can be used to repair your broken belts. Be aware though, me repair will use up some of the belt. Expect to lose about one belt size; d1at is, a repaired 3×24 belt will have to be downsized to fit a 3×21 sander. In me long run, you may be better off throwing away me broken belts and replacing them with high-quality urethane bonded sanding belts.
I use water-based polyurethane varnish, and the brush marks keep showing. In other words, I end up with a rough finish. Can you help?
I use water-based polyurethane varnish, and the brush marks keep showing. In other words, I end up with a rough finish. Can you help?
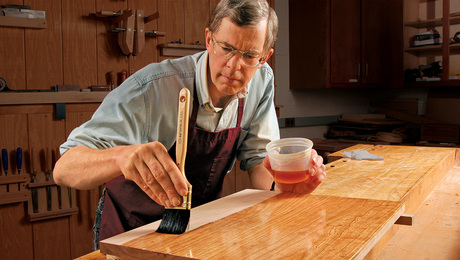
Chris Minick replies: Brush marks in the finish film result when the finish dries before it has had a chance to level. Usually this is a result of insufficient wet-finish thickness or poor brushing technique or a combination of both. Apply a smooth, even layer of finish, the thickness of three sheets of paper, with a minimum of brush strokes. The brush marks at this thickness will flow together before the finish dries. From the start, I always measure the viscosity of the finish. High-viscosity finishes show brush marks and streaks, while low-viscosity finishes tend to run, sag, and drip. With most finishes, a viscosity of roughly that of half-and-half cream flows well. Thinning the finish with the manufacturer’s recommended solvent, which is water for water-based finishes, sometimes is necessary to achieve the proper brushing viscosity. Before dipping the brush into the varnish, I wet the bristles in the solvent, which prevents dried finish from building up at the base of the brush. The material should flow from the brush onto the wood in an even sheet of wet finish. After coating the whole panel, level out the uneven areas by lightly dragging the bristle tips of the unloaded brush through the wet finish. Between each coat, I normally scuff-sand with 220-grit paper to remove nibs or dust specks. Three or four coats of finish are about right for most projects.

Can you suggest a finish that is safe to use indoors? Without ventilation?
During the winter, it is too cold to finish anything in my unheated shop, so I either have to wait until spring or finish in my kitchen. I seem to have more luck with hand-rubbed finishes, and I especially like oils. Can you suggest a finish that is safe to use indoors? Without ventilation?
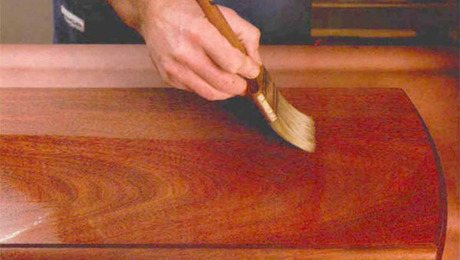
Chris Minick replies: Ten years ago the choice of finishes that could be applied with0ut ventilating the room was severely limited. Not so today. Finish manufacturers have developed low-odor, nonflammable water-based finishes and stains that rival their solvent-based counterparts in protective quality and ease of application. Most water-based finishes are designed for brush or spray application but can be wiped on with a slight change in wiping technique. The normal technique of flooding the wood with oil, waiting 15 minutes and then wiping off the excess finish doesn’t work with water-based finishes because they dry much faster than traditional wiped-on oil-based finishes. A better method is to wipe on a coat of water-based finish with a lint-free rag, then immediately wipe off the excess before the finish starts to dry. Multiple coats are needed to form a significant finish film, but the rapid drying time allows six or eight coats to be applied in one day. Several brands of water-based finishes are available, but I’ve found that General Finishes EF line of finishes and stains works best for wipe-on application.
The Best Brushes

8 Tips for Using Shellac
Sealers: Secret for Finishing Success
Fine Woodworking Recommended Products
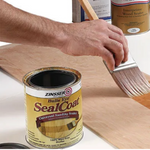
Zissner Seal Coat
Great as a sanding sealer, and as a final finish.
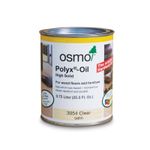
Osmo Polyx-Oil
“If I had to choose one of these hard-wax oils to keep on hand, it would be Osmo Polyx-Oil. It’s relatively affordable and very easy to apply.” -Adam Godet
Waterlox Original
Versatile wiping varnish is easy to apply and great for both satin and gloss finishes.
Sign up for eletters today and get the latest techniques and how-to from Fine Woodworking, plus special offers.